
How to Plan a Tile Layout Before Installation: A Practical Guide
Choosing beautiful tiles is only half the job. The way those tiles are positioned across a floor or wall can completely change how the finished space looks. A well-planned tile installation creates balanced cuts, consistent grout lines and a deliberate visual flow, while a rushed layout can leave awkward slivers around walls, doors or fixtures.
Before starting any tile installation, it is worth spending time on the layout. The right tile layout design considers the room dimensions, tile size, grout joint, focal points, doorways, transitions and the selected pattern. This guide explains how to plan a practical layout from the first measurement to the final installation, whether you are working with ceramic tiles, porcelain tiles, large-format products or decorative wall tiles. Panthera Exim offers a broad range of ceramic and porcelain options in formats suited to different residential and commercial applications.
Why Tile Layout Planning Matters
A tile installation layout is more than deciding where the first tile should go. It determines how the entire surface will be divided and where the grout lines, cuts and pattern changes will appear.
Two rooms with exactly the same tile can look completely different when the tiles are arranged differently. A straight grid can create a calm architectural appearance, while a diagonal arrangement introduces movement. A running bond can soften a long rectangular room, while herringbone creates a stronger decorative effect.
Layout also affects material usage. More complicated tiling patterns generally require more cutting and careful setting out than a straightforward grid. Industry and installation guidance therefore recommends considering the actual room geometry, openings, tile dimensions and joints before fixing begins. (FloorCalc Pro)
A good tile installation plan should answer several questions before adhesive or mortar is applied: Where will the first reference line be? Where will the cut tiles fall? Will the pattern align with important architectural features? Are the edge pieces large enough to look intentional? Does the tile format suit the selected pattern?
Getting these decisions right beforehand is much easier than trying to correct them once the tiles are already fixed.
Step 1: Measure the Space Accurately
Every successful tile installation begins with accurate measurements. Do not rely only on the room's stated length and width, particularly in older buildings or irregular spaces.
Measure each wall or floor edge separately and record doorways, columns, niches, cabinets, islands, drains and other permanent features. Check whether opposite walls are actually parallel and whether corners are square.
For a simple rectangular room, calculate the basic floor area by multiplying length by width. However, the area alone does not tell you how many tiles will need to be cut. The layout pattern, grout width and room geometry also influence the final material requirement.
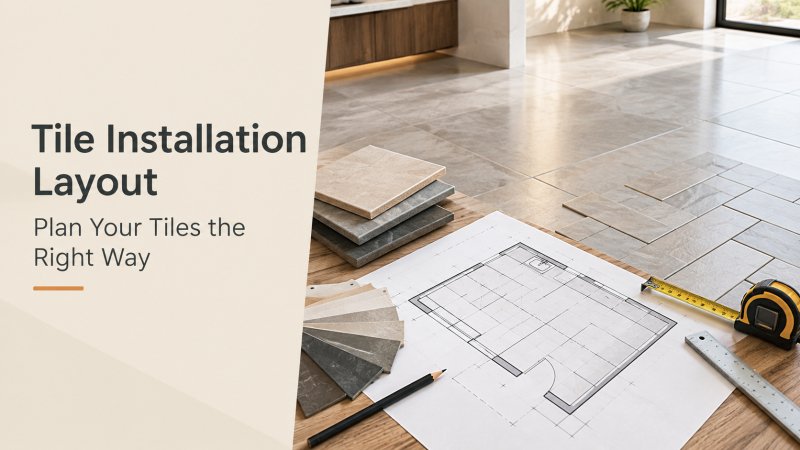
A scaled drawing can make the planning process much easier. Mark the room boundaries and add major fixtures before placing the tile grid. This gives you a clearer view of how the finished tile installation will interact with the architecture.
Step 2: Identify the Main Visual Focal Point
A common mistake is to start laying tiles from the nearest corner simply because it seems convenient. A better tile installation approach is to identify the areas people will notice first.
In a bathroom, the focal point might be the vanity wall, shower wall or freestanding bath. In a kitchen, it could be the island, backsplash or main entrance view. In an open-plan living space, the primary sightline may extend from the doorway across the largest section of flooring.
The layout should support these visual priorities. Where possible, avoid placing a very narrow cut directly in a prominent doorway or against a highly visible feature wall. Balanced cuts on opposite sides often create a more intentional appearance.
This principle applies to both floor tile layout and wall tile layout. The objective is not necessarily to have full tiles everywhere. It is to make the cuts look deliberate and proportionate.
Step 3: Choose the Tile Size Before Choosing the Pattern
Tile size and layout are closely connected. A pattern that works beautifully with a small rectangular tile may not be practical with an 800 × 1600 mm porcelain tile.
Large-format products can create a spacious appearance because fewer grout joints interrupt the surface. Panthera Exim's catalogue includes formats such as 600 × 600 mm, 600 × 1200 mm, 800 × 800 mm and 800 × 1600 mm porcelain tiles, illustrating why layout planning needs to begin with the actual product dimensions rather than a generic pattern.
An 800 × 800 mm glossy porcelain tile can offer a balance between a larger visual scale and manageable installation compared with very large formats
The actual tile size should always be checked against the manufacturer's product information because nominal dimensions and actual calibrated dimensions can differ.
For a large-format tile installation, substrate flatness becomes particularly important. A larger tile spans a greater area, so changes in the substrate can become more noticeable during fixing. The installation system, adhesive, substrate preparation and joint requirements should therefore be considered together rather than treating layout as a purely decorative decision.
Step 4: Select a Suitable Tile Layout Pattern
Once the room and tile dimensions are understood, choose the pattern. Popular tile layout patterns include straight lay, running bond, diagonal, herringbone and other modular arrangements.
Straight or Grid Layout
The straight layout places tiles in aligned rows and columns. It is clean, simple and particularly effective when the tile itself has an attractive surface or large format.
Because the grout lines form a regular grid, accurate setting out is important. Small alignment errors can become noticeable across long runs.
Running Bond or Brick Layout
In a running bond arrangement, each row is offset from the previous row. The pattern works especially well with rectangular tiles and introduces movement without becoming visually complicated.
The amount of offset should be compatible with the tile manufacturer's recommendations. Large-format rectangular tiles should not automatically be installed with a 50% offset simply because that is a familiar brick pattern; tile geometry and product guidance need to be considered.
Diagonal Layout
A diagonal layout rotates the grid, often around 45 degrees. The angled grout lines can change the way the room is perceived and can be useful when a conventional grid feels too rigid.
However, diagonal layouts create more perimeter cuts, so the tile installation usually requires more detailed planning than a straight arrangement.
Herringbone Layout
Herringbone creates a repeating zigzag using rectangular tiles. It can make a floor or wall a strong visual feature, but it requires precise starting points, consistent joints and careful cutting.
Because pattern complexity can increase installation time and offcuts, calculate the material requirement for the selected pattern rather than simply adding a standard percentage to the room area.
Step 5: Create Reference Lines
Reference lines are the backbone of a precise tile installation. Rather than allowing the first row to determine the position of every following row, establish accurate lines before fixing begins.
For a basic grid, two perpendicular reference lines can establish the working layout. The lines should be positioned according to the planned tile arrangement and the desired edge cuts, not simply based on the centre of the room.
A centre line does not always mean that a tile joint should sit directly on the centre. Depending on the tile dimensions and room width, placing the centre of a tile on the reference line may create more balanced perimeter cuts.
The important point is to test the layout first. Move the proposed grid slightly in both directions and compare the resulting edge pieces. A small adjustment at the beginning can significantly improve the finished appearance.
Step 6: Plan the Edge Cuts
Edge cuts are unavoidable in most tile installation projects. The goal is to make them look balanced rather than accidental.
Suppose a room is almost, but not quite, a multiple of the tile dimension. Starting with a full tile against one wall may leave a very narrow strip at the opposite wall. Moving the grid can distribute the difference across both sides.
Very narrow slivers are generally undesirable because they can look visually weak and may be difficult to cut and install cleanly. The exact acceptable minimum depends on the project, tile type and installation system, so the layout should be reviewed by the installer before fixing.
Pay particular attention to corners, doorways and transitions. These are places where people naturally notice changes in direction or material.
Step 7: Consider Grout Joint Width
Tile spacing is part of the design as well as the installation process. The grout joint affects the visual rhythm of the surface and can change the apparent scale of the tiles.
A narrow joint can create a more continuous appearance, while a wider joint can emphasise individual tiles and provide more tolerance for dimensional variation. The correct joint should be based on the tile characteristics, installation requirements and manufacturer's recommendations.
Do not assume that every tile can be installed with the same spacing. Rectified porcelain, handmade-look ceramic, natural stone and other products may have different requirements.
When planning a tile installation, include the intended grout joint in your layout calculations. Otherwise, the final number of tiles across a room can differ from what a simple tile-size calculation suggests.
When planning a tile installation, include the intended grout joint in your layout calculations. You can also use Panthera Exim's tile calculator to estimate the quantity required for your project.
Step 8: Check Large-Format Tile Layouts Carefully
Large-format tile layout deserves extra attention because fewer joints mean each tile has greater visual importance.
A 600 × 1200 mm tile, for example, can create long uninterrupted lines across a floor or wall. That can look elegant, but it also means that poorly positioned cuts or misaligned joints may stand out.
For large-format tile installation, review the substrate, handling requirements, installation method, joint arrangement and movement provisions before work begins. Movement joints are an important part of durable tile assemblies because tile, mortar and substrate can respond differently to temperature, moisture and loading. (Schluter)
For technical guidance on movement joints and tile assemblies, the information provided by Schluter-Systems' tile installation resources is a useful reference. Specific requirements should always be checked against the applicable local standards and the actual installation system.
Step 9: Dry-Plan the Layout Before Fixing
A dry layout gives you an opportunity to spot problems before they become expensive.
Place representative tiles, or mark the tile positions on the surface, to check the main rows and cuts. Look at the layout from the doorway and other important viewpoints. If the project uses a decorative or natural-look product with noticeable variation, inspect several tiles together rather than judging a single sample.
This is particularly useful for products with strong marble-style veining. The orientation of individual pieces can influence the overall visual effect, so planning their direction can be as important as planning the grout grid.
Panthera Exim's porcelain range includes marble-effect and large-format designs, making orientation and pattern continuity relevant considerations when planning premium spaces.
Step 10: Calculate Tiles, Cuts and Waste
Once the layout has been tested, calculate the quantity required.
For a more detailed explanation of tile quantity calculations, wastage and box requirements, see Panthera Exim's tile quantity calculation guide.
Start with the net surface area, then account for cuts, pattern complexity and a reasonable reserve. A straight grid generally creates fewer complicated offcuts than a diagonal or herringbone arrangement, but the actual requirement depends on the room shape and tile dimensions.
Do not use a single waste percentage for every project. A simple rectangular room with a straight layout is different from an irregular room using a complex pattern.
The final order should also consider batch consistency, future repairs and product availability. Keeping a small number of matching spare tiles can be useful because the exact product, shade or batch may not be readily available later.
Compare Common Layout Approaches
|
Layout approach |
Visual effect |
Suitable for |
Planning consideration |
|
Straight lay |
Clean and orderly |
Square or rectangular rooms |
Alignment needs careful checking |
|
Running bond |
Traditional and directional |
Rectangular tiles |
Offset should suit the tile |
|
Stack bond |
Modern and structured |
Walls and contemporary floors |
Highlights grout alignment |
|
Herringbone |
Decorative and dynamic |
Feature floors and walls |
Requires more cutting |
|
Large-format layout |
Minimal joint appearance |
Open spaces |
Requires careful handling and substrate preparation |
A Simple Tile Layout Planning Checklist
Before beginning the tile installation, confirm the following:
- Room dimensions and irregular areas have been measured.
- Doorways, columns, fixtures and transitions are marked.
- Tile dimensions and grout spacing are confirmed.
- The pattern and laying direction have been selected.
- Reference lines have been established.
- Edge cuts have been checked for balance.
- Large-format tiles have been assessed for substrate and handling requirements.
- Movement joints and existing structural joints have been accounted for.
- Tile quantity includes the expected cuts and project-specific waste.
- The installer has reviewed the final setting-out plan.
A short planning session can prevent hours of cutting, rework and material loss later.
Common Tile Layout Mistakes to Avoid
One of the most common mistakes is beginning at a wall without checking the opposite edge. The first row may look perfect, but the final row can end up with an awkward narrow strip.
Another mistake is choosing the pattern entirely for appearance without checking whether the tile format suits it. Not every tile shape works equally well with every pattern. Large rectangular tiles, square tiles, planks and decorative formats each behave differently.
Ignoring fixed features is another problem. A layout that looks balanced in an empty rectangle may become awkward once cabinets, sanitaryware, door openings or floor transitions are included.
It is also risky to ignore existing movement joints. A tile installation should not simply cover or bridge required structural or movement provisions without an appropriate installation solution. Movement joints help accommodate differential movement and reduce the risk of cracking or debonding. (Schluter Systems)
Finally, avoid treating the tile box quantity as the layout plan. The number of boxes required comes after the pattern, cuts and room geometry have been considered.
How Tile Layout Changes the Look of a Room
The direction of the tile installation can influence how a room is perceived. Long rectangular tiles placed along the length of a narrow space can reinforce its linear character, while a different orientation can shift the visual emphasis across the room.
Grout lines also play a major role. Closely aligned joints create a structured appearance, while staggered joints introduce movement. A strong pattern can become the main decorative feature, whereas a simple grid allows colour, texture or veining to take centre stage.
This is why tile design patterns should be selected alongside the tile itself. Instead of asking only, “Which tile do I like?”, consider how the tile, size, direction, grout and room geometry will work together.
Should You Use a Tile Layout Visualizer?
A tile layout visualizer can be useful when comparing different arrangements before installation. It allows homeowners, designers and project teams to see how a particular tile size and pattern may look across a room.
A visualizer is especially helpful when comparing straight, diagonal, running bond and herringbone arrangements. However, a digital preview should not replace physical measurements or professional setting-out.
The actual room may have uneven walls, structural joints, columns, openings or other conditions that are difficult to reproduce perfectly on screen. Treat visualisation as a design tool, then validate the selected tile installation layout against the real site.
How Panthera Exim Tiles Fit Into Layout Planning
Panthera Exim supplies ceramic floor tiles, porcelain tiles, digital wall tiles, outdoor and parking tiles and sanitaryware for international markets. Its catalogue includes multiple tile sizes and finishes, giving designers, importers, distributors and project buyers flexibility when developing different surface schemes. (Panthera Exim)
For international projects, product selection and layout planning should be considered together. Tile size, finish, intended application, installation method, shipping requirements and local project standards can all affect the final specification.
For example, a large-format porcelain surface may suit a minimalist contemporary interior, while smaller wall tiles may be more appropriate when a decorative pattern is the main design feature. The correct choice depends on the room, product characteristics and installation conditions rather than size alone.
FAQs
What is the best way to start a tile installation layout?
Start by measuring the complete space, marking fixed features and identifying the main visual focal points. Then test the tile size, grout joint and chosen pattern before establishing reference lines. This helps balance edge cuts and prevents avoidable layout problems.
Should tile layout start from the centre of the room?
Not necessarily. A centre reference line can be useful, but the best starting position depends on the tile dimensions, grout joint, room geometry, doorways and desired edge cuts. The grid should be adjusted to create abalanced result rather than following the centre automatically.
How much extra tile should I buy for installation?
The required allowance depends on the room shape, tile size, pattern and number of cuts. Straight layouts in simple rooms generally require less additional material than complex patterns or irregular spaces. Calculate the actual layout before deciding the final quantity.
Is a running bond layout suitable for large-format tiles?
It can be, but the offset should be selected according to the tile manufacturer's recommendations and the characteristics of the product. Large rectangular tiles should not automatically use a 50% offset because tile geometry can affect the finished surface. Review the installation instructions before choosing the offset.
Why is tile spacing important during installation?
Tile spacing controls the grout joint and contributes to the overall appearance of the surface. It also accommodates dimensional tolerances between individual tiles. The correct spacing depends on the tile, installation system and manufacturer's requirements, so it should be decided before the installation begins.
Conclusion
A successful tile installation starts long before the first tile is fixed. Accurate measurements, sensible reference lines, balanced edge cuts, suitable tile spacing and a pattern that matches the tile format all contribute to a cleaner finished surface. Large-format tiles and complex patterns deserve additional planning because small layout decisions can become highly visible across a large area.
For homeowners, designers, contractors, and international buyers, the best approach is to select the tile and layout together, test the arrangement before fixing and confirm the installation requirements for the specific product. Panthera Exim provides ceramic, porcelain, and wall tile options for projects across international markets, so if you are planning a new surface scheme, explore the company's collections or contact Panthera Exim to discuss suitable tile options for your project. (Panthera Exim)
